Welcome to our FAQ page about brakes. Here we answer frequently asked questions of our users.
Your question is not listed? Please contact us.
Brake discs
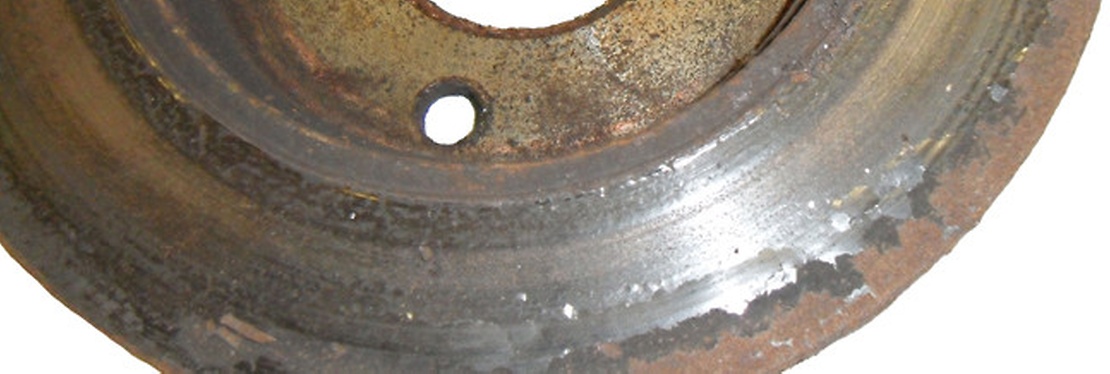
Question: Why did one side of the brake discs turn blue and blister when I replaced them due to brake vibration and judder?
Answer:
This all points to the brake discs overheating. We commonly call this ‘blueing’ due to the changing color of the metal. Overheating in turn, can lead to brake vibration and judder.
It can happen for a couple of reasons:
- A ‘sticking’ caliper piston would result in the brake pads and disc being in constant contact; causing overheating. If only one side has blistered and turned blue, you can assume that the caliper on the other side is releasing correctly.
- A more likely reason for overheating is corrosion or dirt in the carrier ears. Again, this would cause the brake pad to stick, and the constant contact could cause the disc to overheat.
- Excessive heating changes the properties of the cast iron of the disc and causes the blue glazed surface effect; which can be rubbed off leaving the area underneath looking rusty.
To prevent overheating:
- When changing brake pads, clean the area with a wire brush to allow the pads to slide, relatively freely.
- Check the caliper. Look for undue corrosion, stiffness in the guide pins and movement of the carrier.
- Check the seals on the piston. Perfect seals mean no water or dirt can enter and cause premature failure.
Question: I am about to undertake a periodic ATA assessment. How and where do I take the measurement for disc run-out?
Answer:
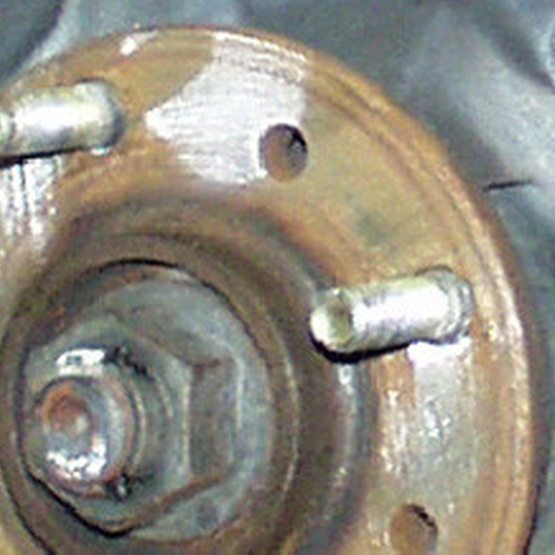
Disc run-out is measured using a dial gage, preferably with a scale of 0.01mm. This needs to be held in a clamp, on an adjustable arm. The arm can be held in position either by a magnetic base or clamp.
The contact tip of the dial gage needs to be in contact with the disc, approximately 10mm in from the edge of the disc. The disc is then rotated on the hub and the run-out is measured by recording the largest deflection on the dial gage. The maximum limit for disc run-out is 0.15mm.
When measuring thus - on the vehicle - run-out can be influenced by the condition of the hub and cleanliness of the mounting surface. Any dirt or rust can lead to run-out. You are measuring this at a distance from the center, so unevenness here will be magnified at the disc extremes.
Question: We often see brake judder following pad and disc exchange. This affects all-makes and has on occasion resulted in warranty rejection of discs. Are we doing something wrong?
Answer:
This could be attributed to a number of factors.
There is a small possibility that the disc could be warped from new or have a poorly machined surface.
We should focus on the fitting of the disc to the hub; especially the ‘mating’ surface between the two parts.
A clean hub service is imperative prior to fitting a new disc. Use TRW Brake Cleaner to remove surface dirt and grime, and a wire brush to remove rust and corrosion. Ensuring there is no rust on the mating surface is essential:
It can mean the new disc doesn’t sit correctly on the hub, which can result in run-out
Secondly, it can result in loose wheel bolts over a period of time. This is common on applications that don’t use ‘disc retaining’ screws. Even if the wheel bolts are ‘torqued’ to the correct setting, corrosion between the hub/disc mounting faces will gradually be converted to dust. This will result in a clearance - reducing the initial wheel bolt torque applied - allowing the bolt to loosen.
Once the disc is fitted you should check for run-out using a dial gage and suitable mounting bracket. The run-out should be measured with the disc correctly installed with all fixing bolts. It should not exceed 0.1mm. In the case of excessive run-out, remove the disc and check the hub for damage, and/or run-out. The maximum acceptable run-out on the hub should be no greater than 0.02mm.
The wheel bearing should also be checked in accordance with the VMs instructions and replaced if necessary as its condition can influence the run-out measurements taken.
Another common problem is excessive grease applied to the hub after cleaning which can result in the disc not having full contact with the hub. This can then result in the disc having excessive run-out, or worse still can result in it being distorted under braking.
common brake problems
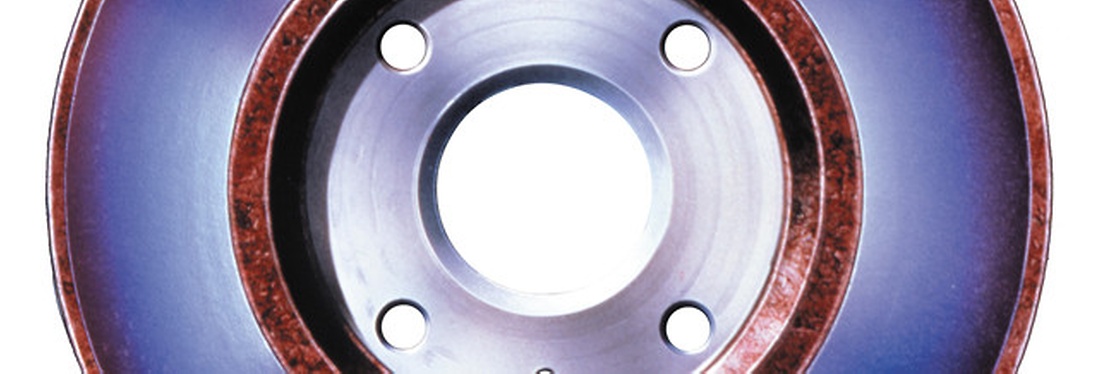
Question: After replacing the front and rear discs and pads on a Peugeot 407 (51,000 miles) the customer is complaining that the brakes are binding and making a grinding noise. I can see there's a slight ‘blueing’ of the discs suggesting they are getting warm. Can you help?
Answer:
Did you change the brake fluid? TRW recommends that brake fluid be changed every two years. With age it absorbs water, which lowers the boiling point, in turn affecting performance and expansion of the fluid.
Your description suggests fluid is expanding but has nowhere to go. Heat generated in the pads, discs, shoes and drums is transferred to the fluid. As the temperature increases the fluid expands. Under normal circumstances this expanded fluid returns to the master cylinder reservoir. If it cannot, pressure builds. When the fluid cools down, the pressure reduces and the brakes release. You need to take your tools with you, and drive the car until the brakes bind.
Now follow these simple steps:
- Step 1: When the brakes bind, slacken the nuts holding the master cylinder to the servo by two or three threads. Press and release the brake pedal. If the problem persists, proceed to step 2.
If this works, there is a problem with the servo or the mechanical links to the pedal. Check that an incorrectly adjusted brake light switch is not holding down the pedal. If the pedal has a link rod to the servo, check it is well lubricated and moves freely. If the problem is not caused by the brake light switch or by the link rod sticking, the link rod or servo push rod could have been incorrectly adjusted. Otherwise you have a faulty servo. - Step 2: Slacken one pipe at the master cylinder for each circuit in sequence. Use a rag to absorb the fluid. This will release any pressure in that circuit. If the problem persists, proceed to step 3.
If the brakes now release, then it is highly probable that the master cylinder seals have swollen through contamination (old or dirty fluid) and are blocking the compensating/relief ports. - Step 3: Staring with the hottest wheel first, slacken the bleed nipple/s on the caliper. If the brakes do not release, proceed to the next hottest wheel and repeat. If they do, the problem is a faulty flexible hose attached to that wheel.
Note: It is not uncommon for the inner wall of a flexible hose to collapse. If this happens, the collapsed wall can act as a one-way valve restricting the return of fluid. - Step 4: If the brakes are still binding, release the handbrake and start again.
Important Note: Remember to re-tighten all pipes/unions, nut/bolts and bleed nipples.
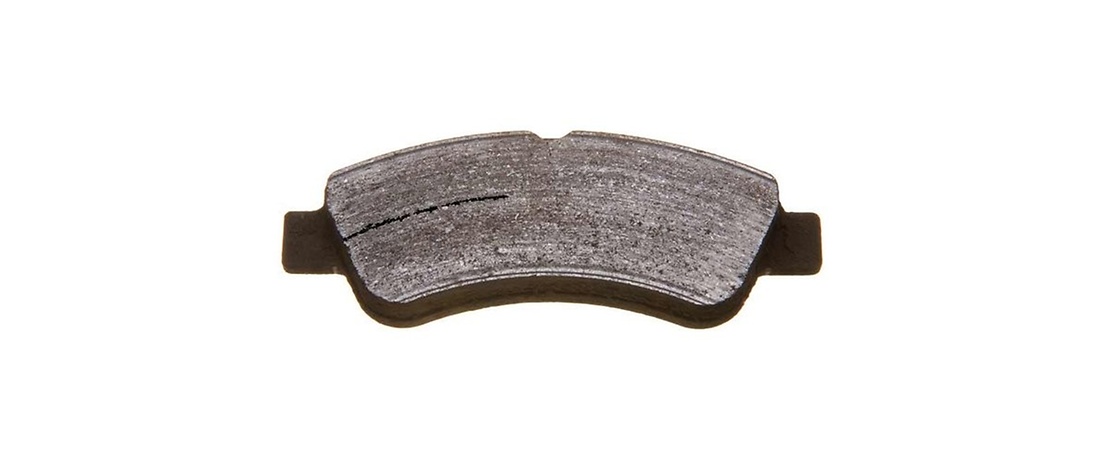
Question: I have just fitted new brake pads to my car and am experiencing a great deal of squealing coming from the brakes. I read in an automotive magazine that this was because I didn’t smooth or ‘de-burr’ the edges of the brake pad with sand paper before fitting. Is this correct?
Answer:
If the edges of the brake pad need smoothing or de-burring before fitting, then I would seriously question the quality of them! The noise is likely to be caused by not fitting new brake discs at the same time. When you change the brake pads, you should always change the discs at the same time. As the brake pad and disc wear, you usually get two ridges on the inner and outer edge of the disc. If you do not change the discs at the same time, then the new brake pad is likely to sit ‘on’ these ridges and not make proper contact with the disc, therefore being less efficient and generating undue noise. Also, make sure the caliper is clean and all moving parts such as the slides and pins have free movement.
TPMS System
Question: I had a Mini in my garage with a tire pressure monitoring system (TPMS) fault. Without the correct equipment, I had to send the vehicle to the main dealer. He diagnosed an ABS sensor fault. Can you explain how an ABS sensor can affect the TPMS system? And can you recommend a tool which means I won’t have to take the car back to the main dealer in future?
Answer:
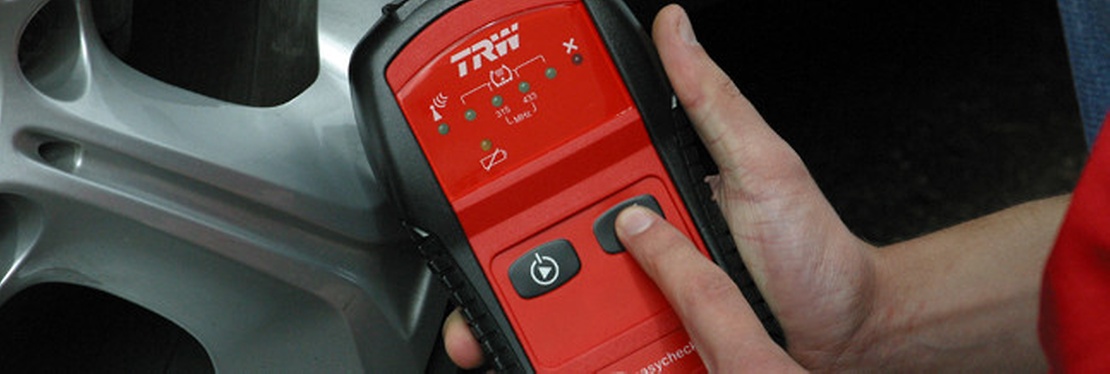
Lets look at the last part of your question first. The simple answer is yes there is a tool, TRW Easycheck. The full function tool comes with: Brake (ABS & EPB); Climate; Scan (EOBD); Service; Supplemental Restraint System (SRS), Steering Angle Sensor (SAS) and TPMS. This function will allow you to read and clear fault codes on TPMS systems and re-code valves back to the main ECU in the event of a new valve being fitted or when the wheel positions are rotated on the car. An additional Valve Activator tool may be required on some systems, and of course TRW has this available as an optional extra.
Now to the first part of your question. There are two distinct systems for TPMS, direct and indirect. Direct systems use physical pressure sensors inside each tire/wheel and send information from inside the tire to the TPMS ECU and instrument cluster. These systems can identify pressure irregularities in all four tires in any combination.
They are designed to cope with both ambient and road-to-tire friction based temperature changes. The alarm trigger points are usually programed in the ECU based on the vehicle manufacturers recommended cold inflation pressures.
Indirect systems do not use physical pressure sensors and this is the type of system fitted to the Mini you mentioned. Indirect TPMS measures the “apparent” air pressure by monitoring individual wheel rotational speeds and other signals available outside of the tire itself. Most indirect systems work on the basis that an under inflated tire will have a slightly smaller diameter than a correctly inflated tire, and therefore rotate at a higher speed to cover the same distance as a correctly inflated tire. All this is realized in software within the ECU using the ABS wheel speed sensors. Therefore indirect systems can only really warn of under inflation after the event. Another disadvantage is that whenever the tire pressures are changed (i.e. routine pressure check and inflation) the system must be re-calibrated by the driver, usually by pushing a button on the dash. The calibration must only be performed when all tires are at the correct pressure, otherwise the system will not report correctly.
Hopefully you will now see the connection between ABS sensors and TPMS.
With TRW’s easycheck service tool, you would have been able to read any fault codes in both the ABS and TPMS systems, diagnose which wheel sensor was faulty and complete the whole job yourself without having to rely on the main dealer. Don’t forget, TRW also has an ever increasing range of ABS sensors available in the aftermarket.
Important Note: Repairs to motor vehicles should only be carried out by appropriately qualified motor mechanics. Please note that specific makes and models of motor vehicles differ, and that the advice given in this website may not be appropriate in all cases. TRW KFZ Ausrüstung GmbH will not accept any responsibility or liability for loss or damage howsoever caused as a result of reliance upon the advice given in this website, save to the extent that such liability may not, by law, be excluded.
Drum Brake Superkits
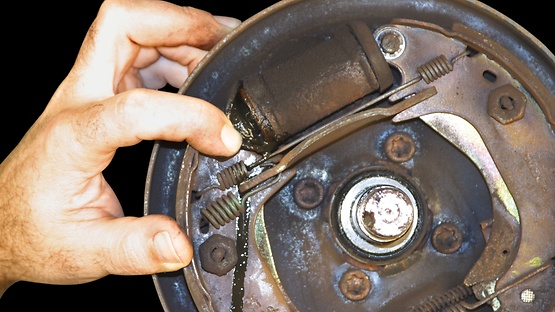
Question: I have a car in the workshop at the moment with a leaking wheel cylinder on the offside. Should I replace the nearside cylinder as well?
Answer:
The simple answer is yes. TRW always recommends that parts such as wheel cylinders be changed in axle sets.
However, the age of the vehicle should also be taken into account. You didn’t mention this in your question, so I will assume the car is of an age where natural wear and tear have played their part.
Remember, if one cylinder has started leaking, the likelihood of the other following suit very shortly is quite significant. Also, the brake force balance can be affected if one side of the vehicle has a new wheel cylinder and the other has a worn one.
You should also look at the condition of the shoes, particularly on the side with the leaking cylinder, as this may have lead to contamination of the friction lining. If this is the case then the brake shoes must be replaced, and again the same rule applies - replace both sides.
The Good News:
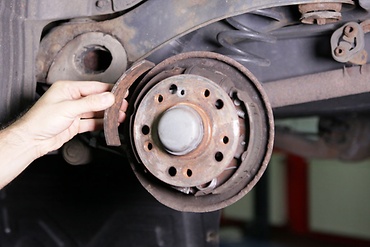
TRW offers a range of Drum Brake Superkits containing all the parts needed to replace the wheel cylinders and shoes. But it gets better still, the shoes come pre-assembled with a new self adjuster and springs, pre-spaced to fit the application, and include new screws, clips and anti-judder pins. Not only does a Superkit save you valuable workshop time (and therefore money) but you are able to inform your customer that their rear brakes are now fully restored to original factory condition and good for many miles of worry free motoring.
Just think of the possible aggravation you could receive from the customer if, after only changing the offside wheel cylinder, they were back at your workshop in two months complaining of poor braking again and you have to repeat the process all over again! Not only is it more time consuming for you, but the customer may think they were short changed in the first instance.
Useful Tips
- Once you have removed all the old components and before you fit the wheel cylinder, ensure the backplate is cleaned thoroughly with TRW brake cleaner.
- o help reduce wear and noise always apply grease on the backplate, but ensure it does not come into contact with the shoe friction face or the auto adjuster mechanism as this can lead to collection of dirt and incorrect operation.
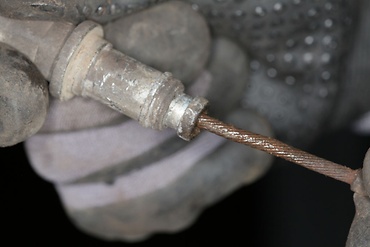
- You can now fit the pre-assembled shoes and connect the hydraulic system but before connecting the handbrake cable, actuate the foot brake to activate the auto-adjust mechanism so that the shoes are in the correct position. Only then should you re-connect the handbrake cable. If the cable is adjusted too much it will affect the correct operation of the auto-adjustment and could lead to long pedal travel.
- And finally, ever more relevant now, with an increasing number of small vehicles having drum brakes on the rear and with all the variations of handbrake mechanisms in the market place, a logical but often overlooked tip is to just work on one side at once, that way you have a reference to how everything is fitted.
As one of the leading OE drum brake manufacturers worldwide, TRW’s experience in drum brake technology translates directly into the aftermarket and TRW’s extensive range of Superkits provide the full solution
Important Note: Repairs to motor vehicles should only be carried out by appropriately qualified motor mechanics. Please note that specific makes and models of motor vehicles differ, and that the advice given in this website may not be appropriate in all cases. TRW KFZ Ausrüstung GmbH will not accept any responsibility or liability for loss or damage howsoever caused as a result of reliance upon the advice given in this website, save to the extent that such liability may not, by law, be excluded.
Electric park brakes
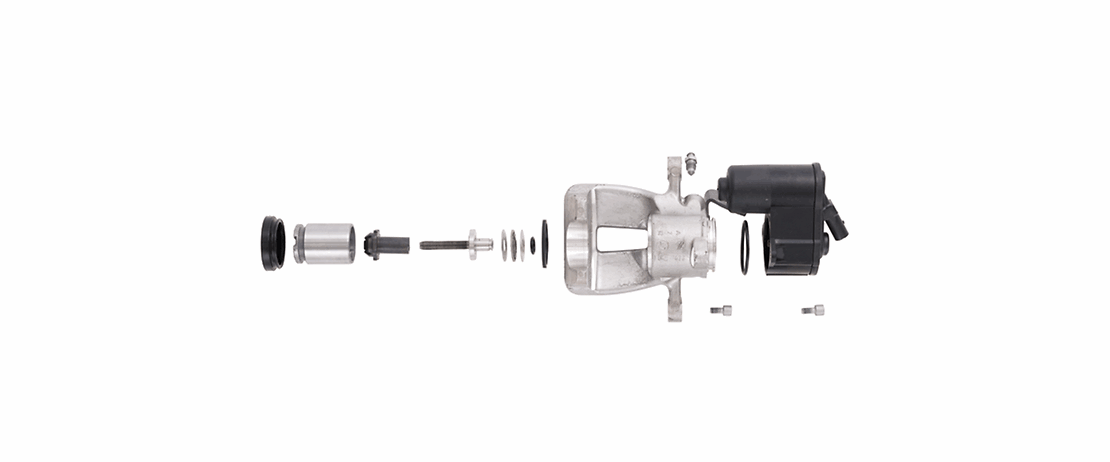
Question: I have just been employed as a mechanic in a successful MoT testing garage. This is my first... job in a few years and I don’t want to appear out of touch! How do I test a vehicle with Electric Park Brake (EPB)? There seems to be no way of applying handbrake pressure without locking the wheels.
Answer:
I can only speak for TRW’s system and not the ‘cable puller’ system fitted to cars such as the Citroen C5 and Range Rover etc. Technically, these systems are not really EPB, rather they are an electric motor pulling on conventional cables coupled to conventional calipers.
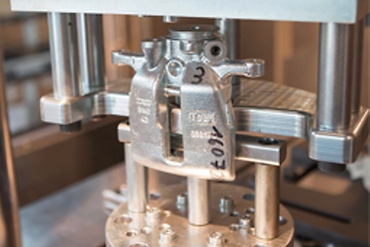
The TRW system uses separate actuator motors on each rear caliper, controlled via an Electronic Control Unit (ECU). And the TRW system has special software incorporated in the ECU for MoT type testing.
If you put the car on a rolling road and drive the rear wheels only the ECU detects that the front wheels are stationary but that the rear wheels are moving. It assumes that the vehicle is on a rolling road and puts the EPB system into test mode.
If fitted with one, this comes up as a message in the multi-function display on the vehicle dashboard. The tester can then either press or lift the handbrake-switch and hold in position.
The ECU will then apply the electric handbrake with sufficient force to obtain a reading on the roller brake tester, without locking the wheels.
Once the readings are obtained and recorded the switch is released. The tester then re-applies the handbrake in the normal way and the wheels will lock.
Test complete.
Please note: at all times adhere to the specific instructions and specifications as provided by the vehicle manufacturer.
ZF Aftermarket product range
Discover the complete portfolio of brakes in our product catalog.
