How to Change the Transmission Oil on a Passenger Car - ZF Aftermarket

ZF Aftermarket Worldwide -

Your Partner Wherever You Are

You are here:

Central Area (deutsch / english)

All ZF Aftermarket websites

Find your region

You are looking for company information on ZF Friedrichshafen AG?

Visit our corporate website

Please select your region and language:

Back
Asia-Pacific
Europe
Latin America
Middle East
North America
South Africa
Global: English

Note

The page you are navigating to is not optimized for mobile devices.
Do you want to proceed?

Proceed

MASTER

How to Perform an Oil Change
And What to Bear in Mind

How to change the transmission oil on a passenger car
Do automatic transmissions need oil changes too? Absolutely! It is the only way to maintain a pleasurable drive and premium performance in the long run.

How to Change the Transmission Oil on a Passenger Car

A Step-by-Step Guide

1. Before changing the oil

To avoid damaging the transmission, adhere strictly to the vehicle manufacturer's instructions. For example, never run the engine or tow the vehicle without any oil in the transmission.

1. Before changing the oil

To avoid damaging the transmission, adhere strictly to the vehicle manufacturer's instructions. For example, never run the engine or tow the vehicle without any oil in the transmission.
2. Draining the oil

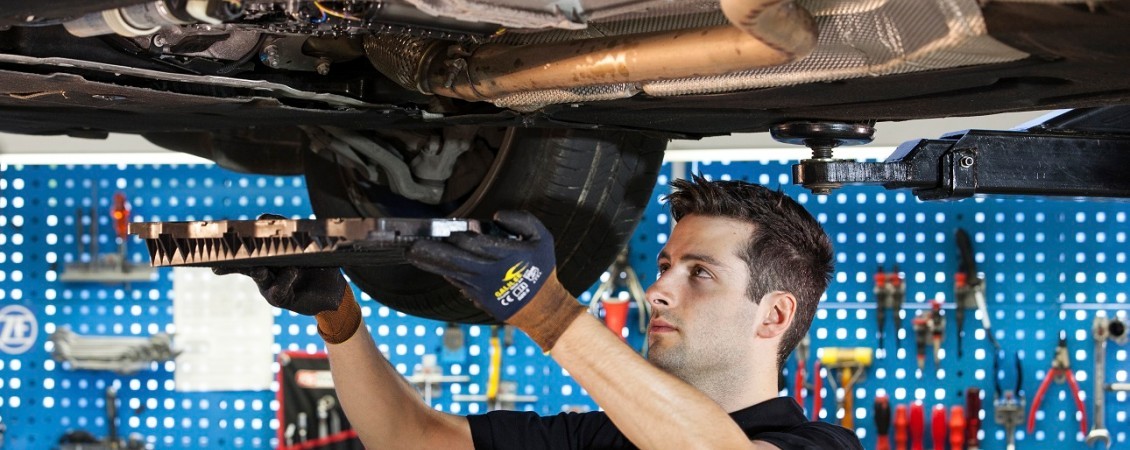
First, remove all underbody trims or covers as necessary.

Use the oil drain plug on the bottom of the oil pan to drain the old oil from the transmission and collect it in a suitable container.

If the oil smells burned, contains chips or, in the worst case, fragments of metal, the transmission is damaged. If this is the case, please contact your ZF Aftermarket Service Center immediately.

3. Removing the oil pan

Metal oil pans:

Only the oil filter and sealing ring need replacing. Loosen the oil pan screws in the sequence specified by the vehicle manufacturer to avoid distorting the pan. Afterwards, remove the old filter and any residual oil from the pan and the permanent magnet.

Next, install the new filter and sealing ring. Observe the specified tightening torque. If you are using a ZF Aftermarket oil change kit, the oil filter and sealing ring are included.

Plastic oil pans:

These have an integrated oil filter and sealing ring, so they need to be replaced as a unit.

4. Installing the oil pan

Use new screws to install the new or cleaned oil pan. If you are using a ZF Aftermarket oil change kit all the necessary screws are included. When tightening down, always observe the sequence and tightening torque specified by the vehicle manufacturer.

4. Installing the oil pan

Use new screws to install the new or cleaned oil pan. If you are using a ZF Aftermarket oil change kit all the necessary screws are included. When tightening down, always observe the sequence and tightening torque specified by the vehicle manufacturer.

5. Installing the drain plug

Now install the new drain plug along with a new seal, paying attention to the specified tightening torque.

Example illustration of the tightening sequence: crosswise originating from the center. Insert all the screws by hand first and then tighten in the right sequence using the correct tightening torque.

5. Installing the drain plug

Now install the new drain plug along with a new seal, paying attention to the specified tightening torque.

6. Filling ZF transmission oil

Be very careful when filling oil. Over- or underfilling or using oil at the wrong temperature can damage the transmission.

Open the automatic transmission's filler plug and top up the specified ZF-LifeguardFluid until it runs out of the filler hole. Do not use any supplementary additives or cleaning agents as they would alter the transmission oil's chemical composition.

7. Running the engine

Let the engine run at idling speed and then select positions R and D one after the other. Afterwards, shift gears according to the table below, depending on the transmission variant (A, B or C).

7. Running the engine

Let the engine run at idling speed and then select positions R and D one after the other. Afterwards, shift gears according to the table below, depending on the transmission variant (A, B or C).

Transmission variant Gears to be selected Hold gear for Additional operations
A 1st to 3rd 3 sec. -
B 1st to 4th 10 sec. -
C all 10 sec. Keep the engine speed at 2,000 rpm for 30 seconds to fill the torque converter with oil.

8. Checking the oil temperature

Now check the oil temperature. It must be between 30°C and 35°C max. (6HP) or 40°C max. (8HP). Allow the engine to warm up or cool down to regulate the oil temperature.

8. Checking the oil temperature

Now check the oil temperature. It must be between 30°C and 35°C max. (6HP) or 40°C max. (8HP). Allow the engine to warm up or cool down to regulate the oil temperature.

9. Checking the fill level

Once the oil temperature is between 30°C and 35°C (6HP) or 40°C (8HP), check the fill level. If no oil is running out of the filler hole, the quantity of oil is too small. If this is the case, top up with the specified ZF-LifeguardFluid until it runs out of the hole.

Let the engine run until the transmission temperature is at 40°C and only a few drops spill out of the filler hole. Now close the filler plug and tighten it to the specified tightening torque.

Step by step instruction

for transmission oil change on a Hybrid Passenger Car

Would You Like to Get in Touch With Us

About Changing the Transmission Oil on Passenger Cars?